Today, let’s see what does the term ‘Open source’ or ‘Freedom to modify’, that we’ve been hearing since the days of Linux. As the heir of Linux, Android has carried the fame along all the way, winning battles against most of the other Smartphone operating systems in the market. It is the freedom to modify and redistribute without any chains to hold. And, as an end-user (which you are), the gates of freedom open with the developer options. It’s the stepping stones of customization and freedom that has been labelled so far. You wouldn’t see anything like the flexibility these offer in any other OS.
Full Step-By-Step Video Guide
#1 How to Enable Developer Options:
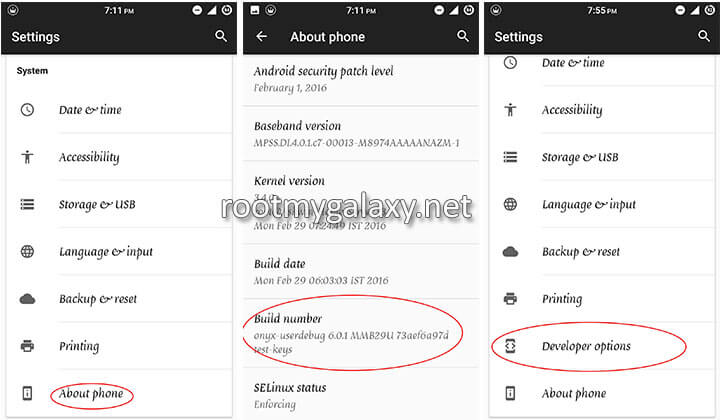
As said earlier, the developer options are the gateway to customization and modding (as we call it). It comes with a lot of options including adjusting how many processes should your CPU handle and the functions of your embedded GPU. To enable developer options, the methods depend on your Android Version. Assuming that you’re not running anything older than Jellybean,
Go to Settings Scroll down a bit and find ‘About Phone’. Should be at the bottom of the settings. This will show up many details such as Phone Model, Manufacturer’s Name, Kernel Version, Build Version, etc. Tap on ‘Build Number’ a few times. Usually, it takes about 7 taps. A small dialog will flash saying ‘Developer Options Enabled’ or something similar. Now press the ‘Back’ key and you will see that ‘Developer Options’ are added to the Settings. Tap on it and if the Slide next to ‘Developer Options Enabled’ isn’t in ON position, turn it ON.
Now you can tweak the Developer Options. But beware of the risks that involve. I wouldn’t recommend doing anything here unless you know what you’re doing.
#2 How to Enable USB Debugging (Android Debugging)
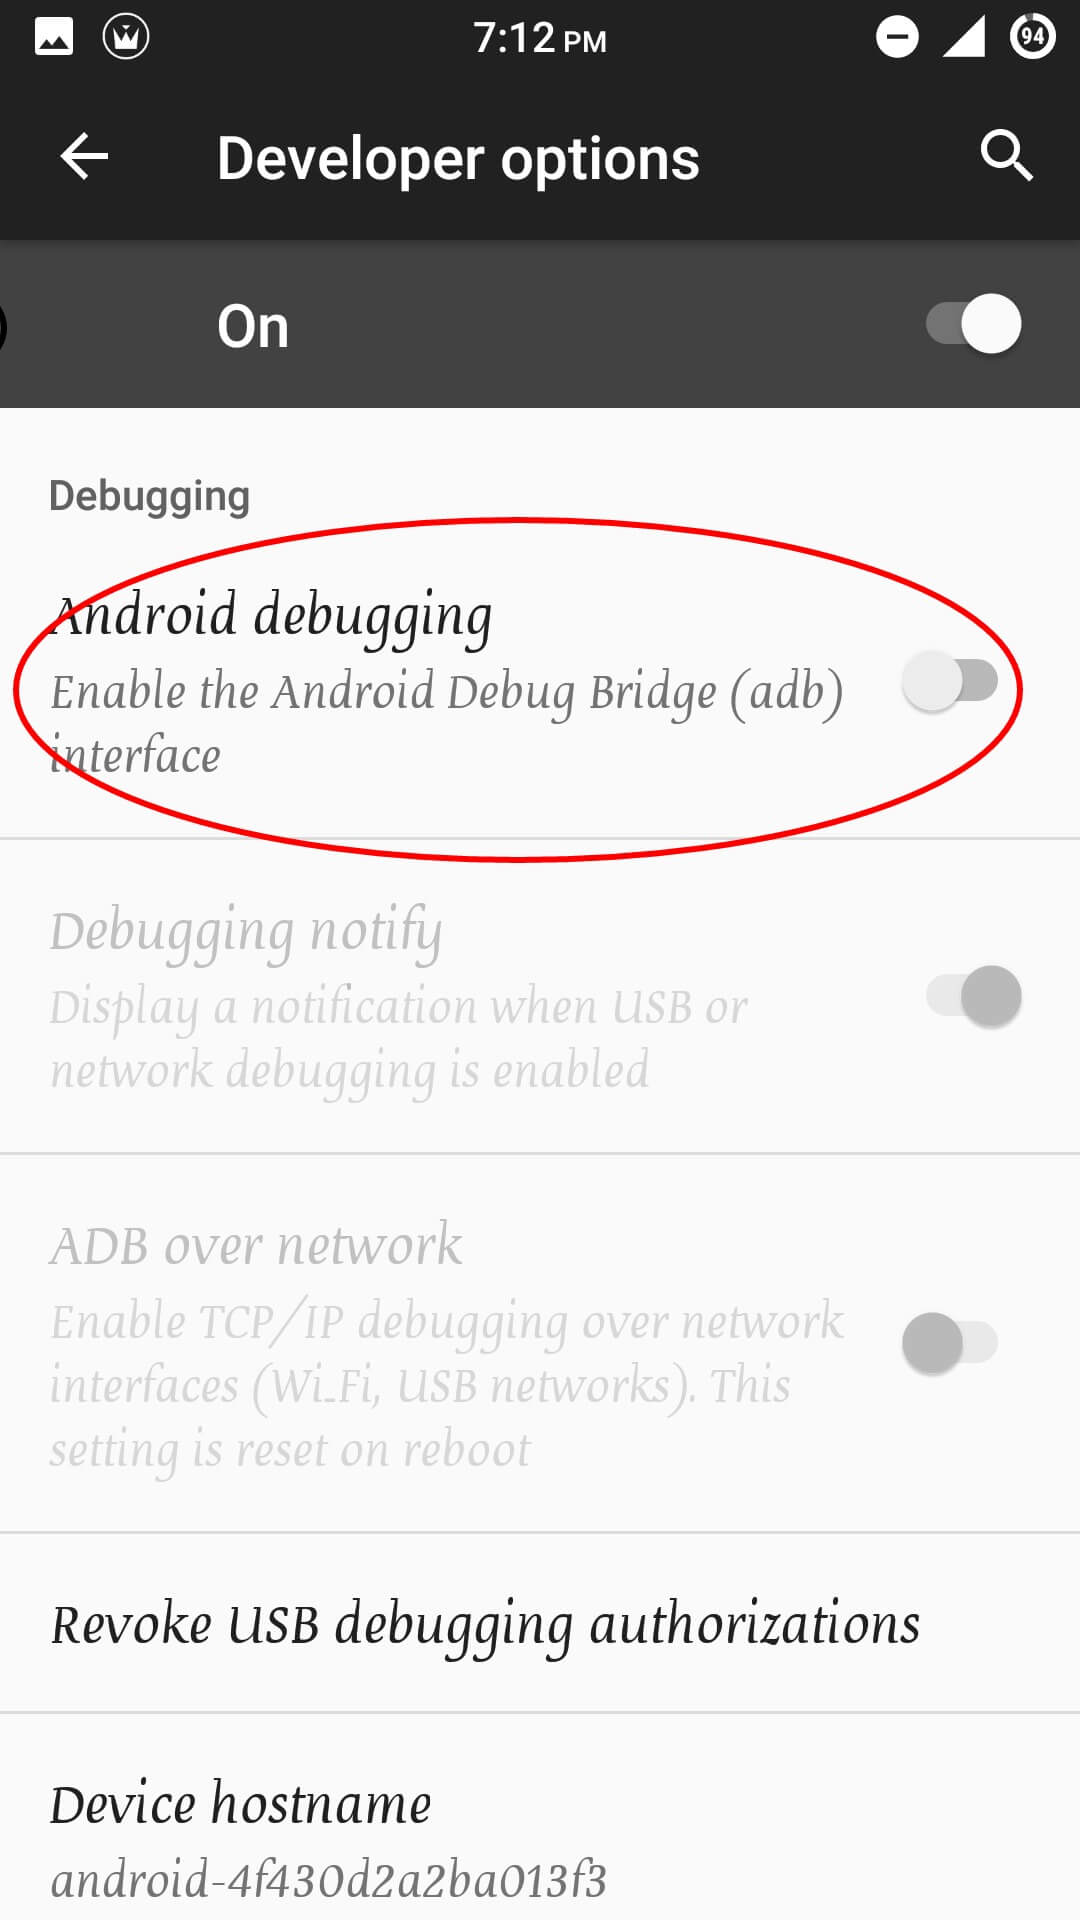
As many have often wondered about this Option since the days of first android, the answer is that the USB Debugging is just a mere gate opener for the ADB utility to access your phone. ADB is the most powerful tool when it comes to fixing your device or customizing it with Custom ROMs and Kernels and Scripts. If you are taking the experimental road of rooting and customization, never forget to leave USB debugging enabled. To enable USB Debugging:
Go to Settings. Search for ‘Developer Options’ you have enabled earlier. Inside Developer Options, search for ‘USB Debugging’. Make sure that ‘Enable Developer Options’ were ON; else you wouldn’t be able to do anything. Slide or Tick the box next to USB Debugging. Now, connect your phone via USB to the PC. There should be USB Debugging listed in the status bar. If it asks for prompt, tap on ‘Always Enable’.
And that’s it! You can access your phone through ADB even when the phone is bricked. A life saver truly!
#3 How to Enable OEM Unlock
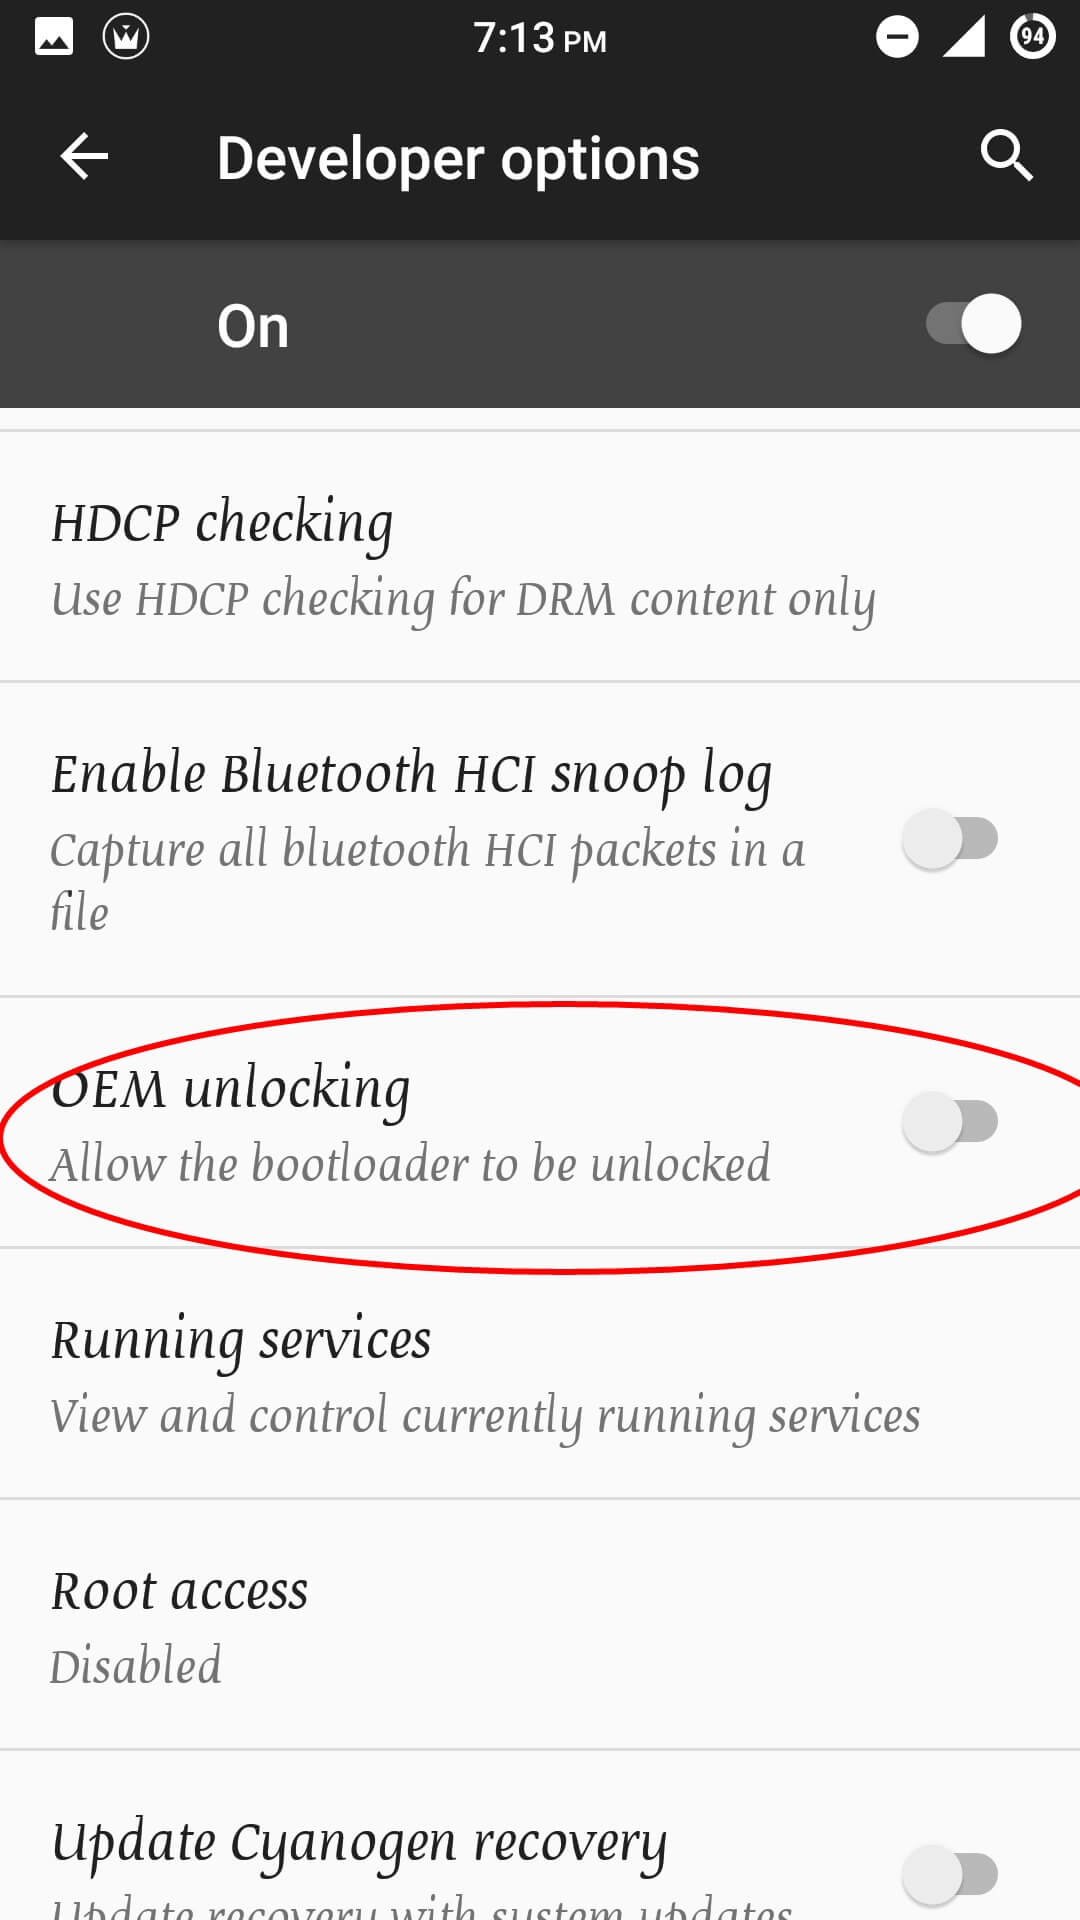
After all these years, we are yet to familiarize ourselves with the term ‘OEM’ and it’s extends. That’s not actually my topic to cover but, OEM Unlock is sort of my responsibility. So, what is this ‘OEM Unlock’ in android device? Well, we haven’t seen that term mention anywhere inside the Android UI till Android 5.0, the Lollipop. OEM Unlock is the key to locking and unlocking the bootloader of the device. It needs unlocking to modding through flashing ROMs, Kernels, etc. This feature might come pre-checked in some Nexus devices, the children of Google themselves but, not every phone has such privileges. So, let’s take a look at how you can enable the OEM to unlock the easy way and the hard way.
[icon name=”hand-o-right” class=”” unprefixed_class=””] Androids with OEM Unlock option (v5.0):
Well, of course we start by opening ‘Settings’. Fetch the recently unlocked ‘Developer Options’. If you haven’t read it and Enable it first. Search for ‘OEM Unlock’ in the Developer Options. It should be under the ‘Bluetooth HCI’. And tap on the box right next to it. And that’s it! You can access the bootloader now.
Further tinkering in ADB is risky and I wouldn’t appreciate you blaming me for the damages. So, learn what ADB does and be wise. Thus, you got all the freedom Linux offers and can customize your phone as you please.


